New mining platform integration and guide - Mine QRL on MMP OS

15th May 2020
MMP OS: Miner management made easy
It’s possible to mine QRL with XMRIG on your Windows or Linux machine, but if you want to expand your mining operation to more than one machine, it’s useful to look into mining platforms like MMP OS — which we’re now happy to be supported on!
MMP OS gives you the ability to manage multiple different computers (mining rigs) from the comfort of your browser window.
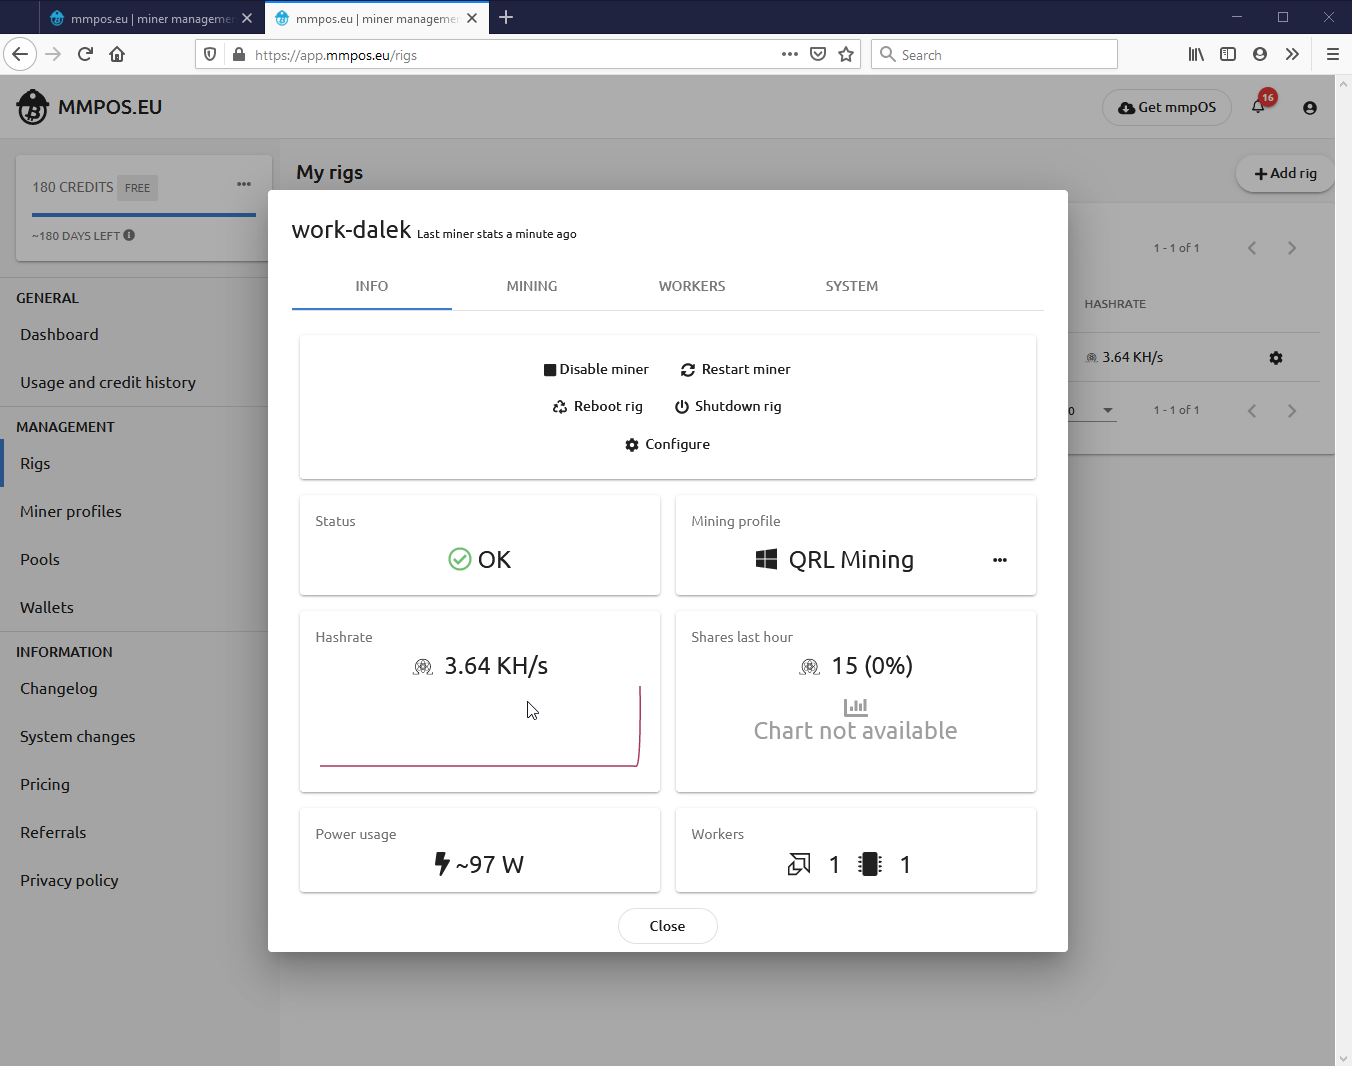
The things you can do from one location includes:
- Status updates for each mining rig. Easily glean the overall status, power usage, hashrate, temperature and other key indicators of a healthy mining rig
- Ability to disable or restart the miner.
- Sum hashrate and average shares of all mining rigs
- Add/remove/reconfigure mining pools
- Add/remove/reconfigure wallets
- Add/remove/reconfigure mining profiles
In short, the MMP (Miner Management Platform) and the corresponding MMP OS makes managing mining QRL a breeze.
Getting started
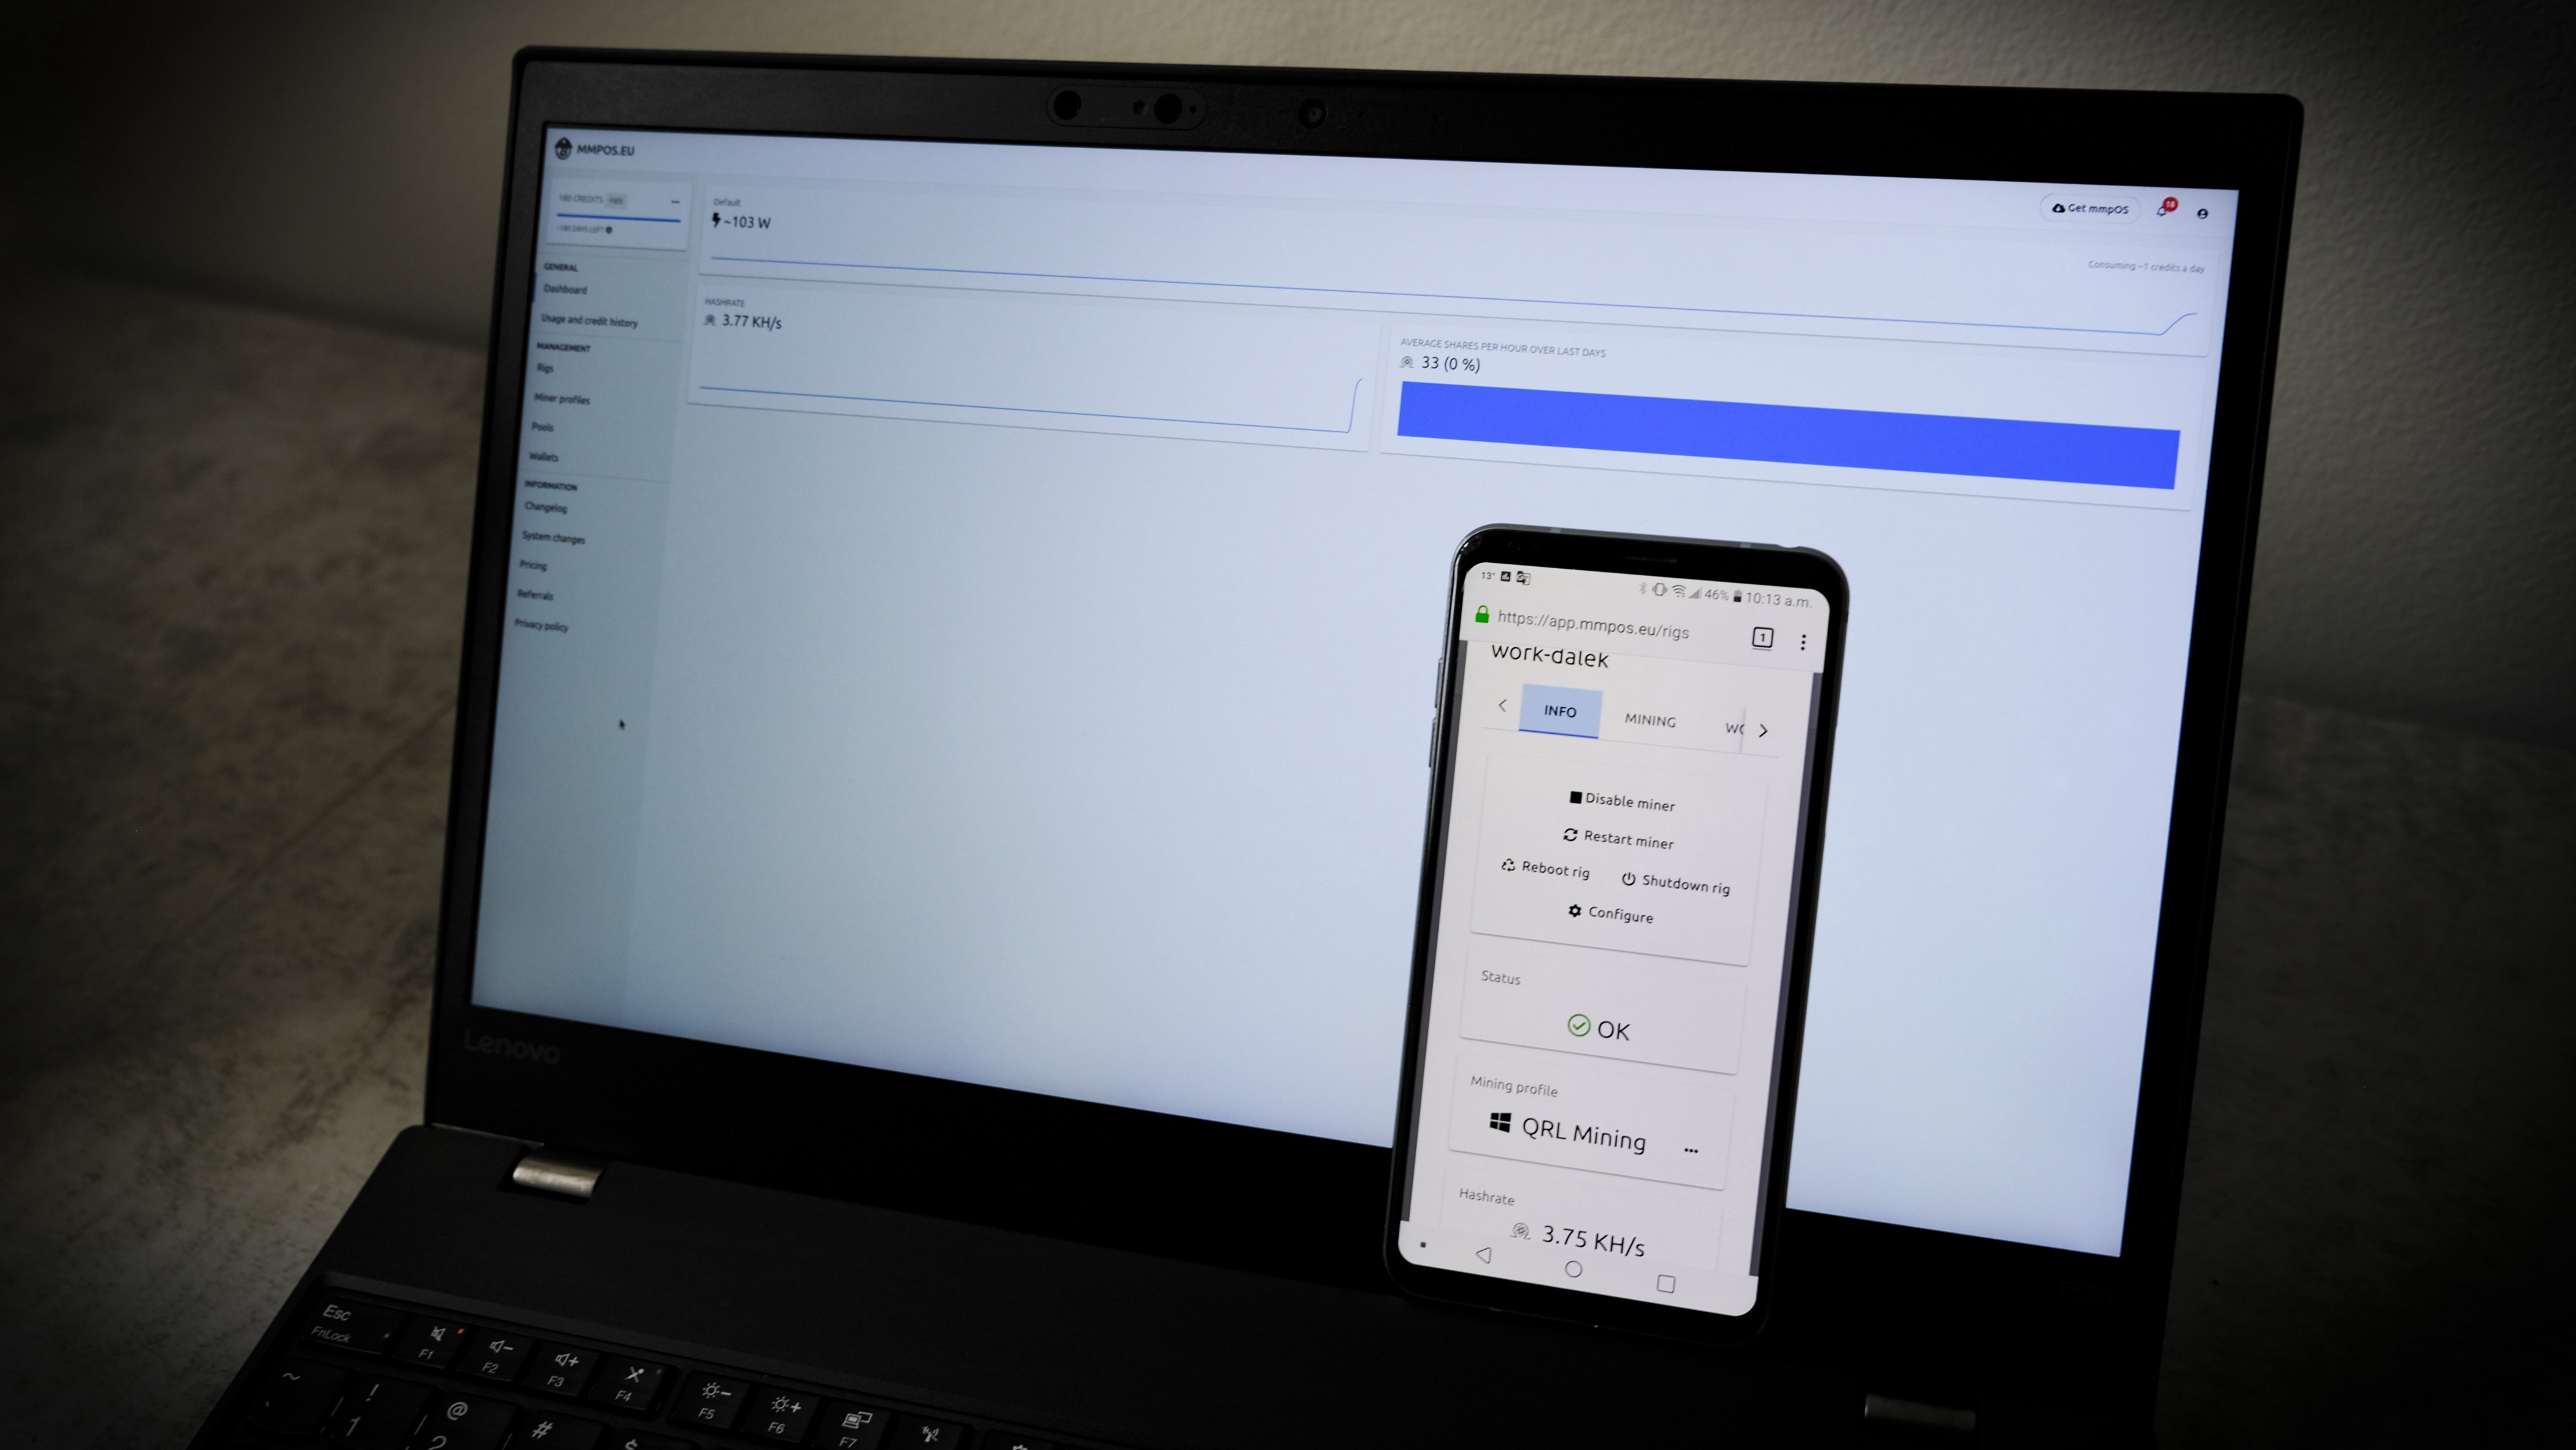 Manage your QRL mining empire on the go from your phone!
While MMP OS makes things as easy as possible, there’s still a few more steps involved in getting everything setup than with your local xmrig configuration. In this guide, we’re going to get setup on Windows, but it’s possible to get everything setup on Linux as well with the same principles applied here.
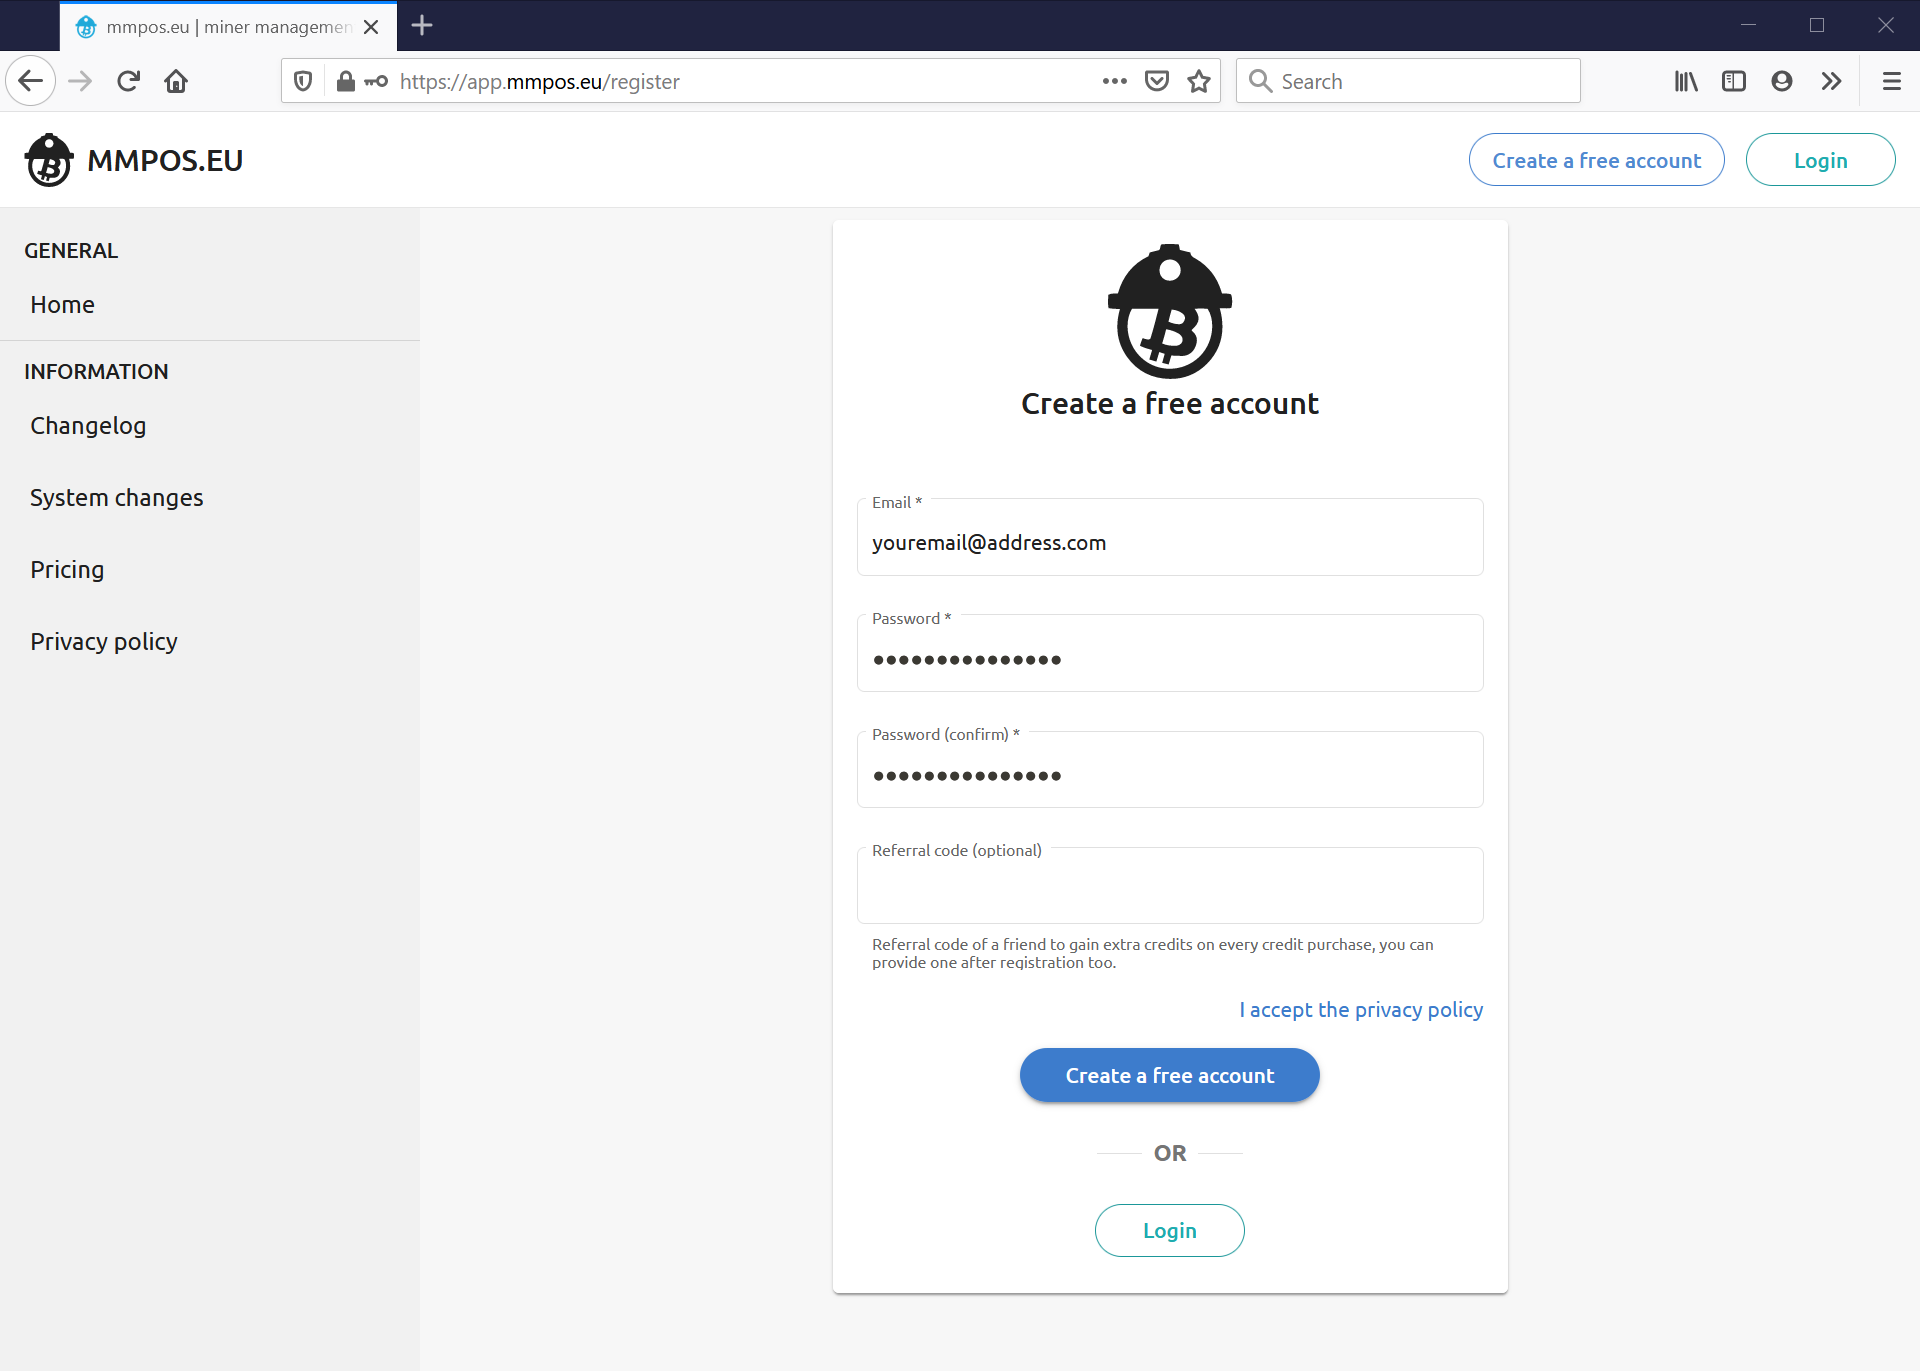
Step 1: Signup
Go to https://app.mmpos.eu/register and register.
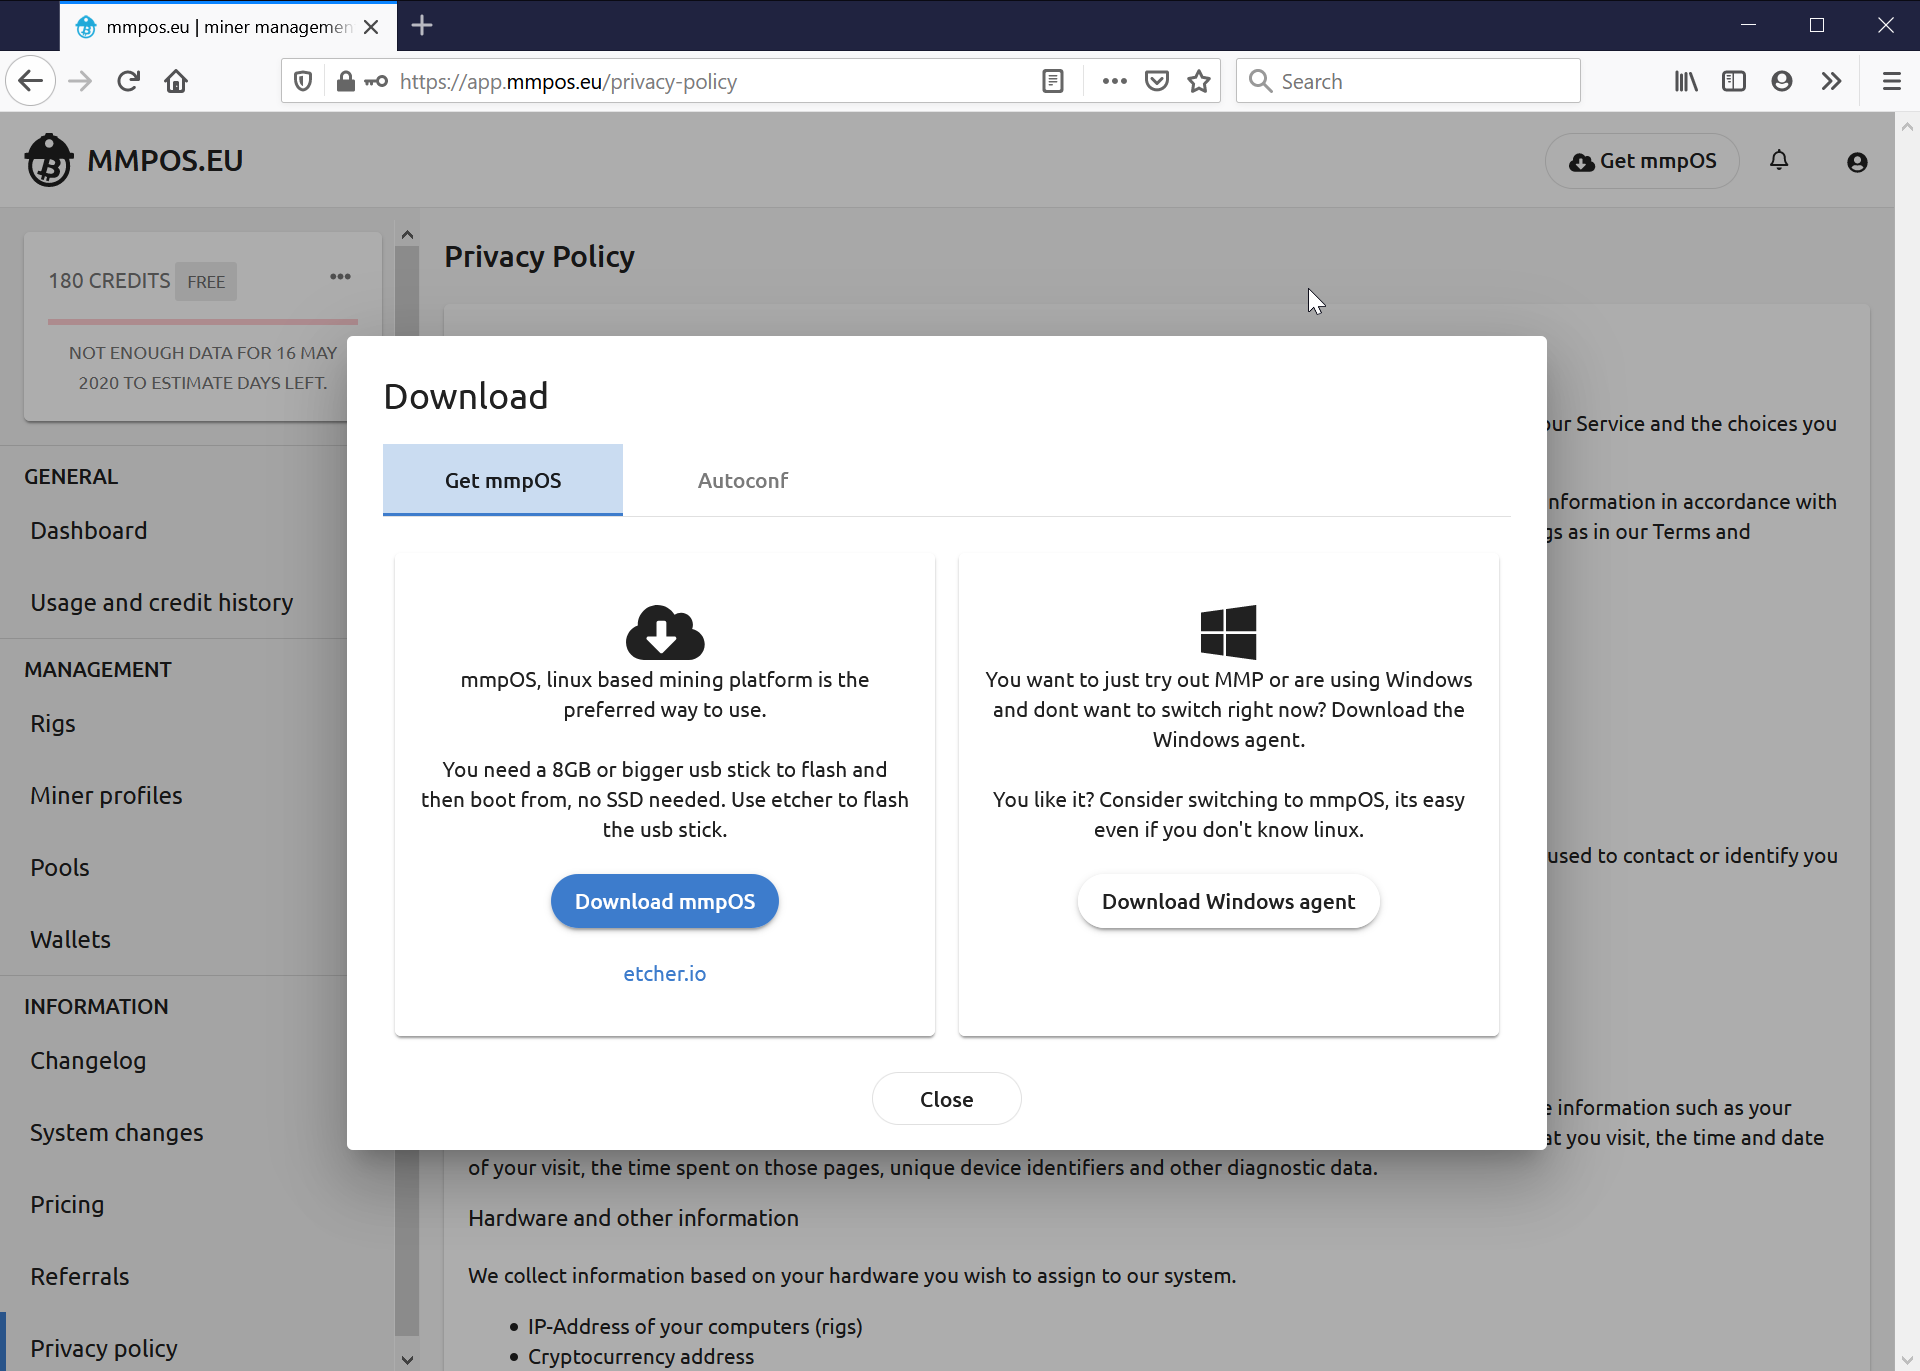
Step 2: Login and download the Windows Agent
You’ll get two options here, one is to download *mmpOS *or the Windows Agent. This guide is going to take you through installing the Windows Agent, but if you’re setting up multiple rigs, you’ll want to get mmpOS.
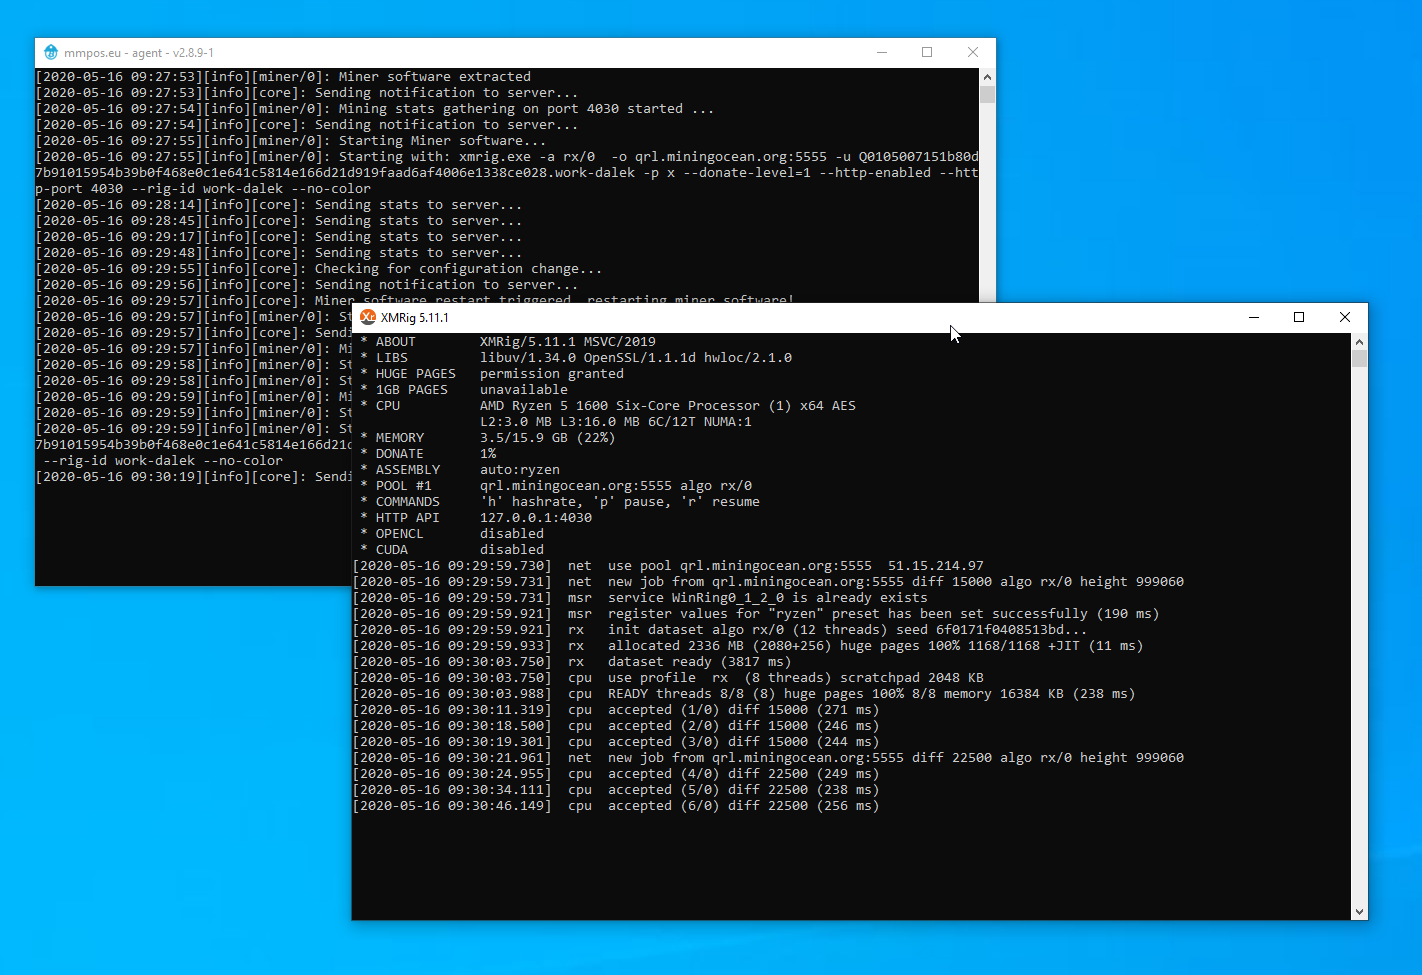
After downloading, extract the contents of the zip folder and click on ‘agent’. This agent will be listening for commands we give it later in this guide. Leave it open.
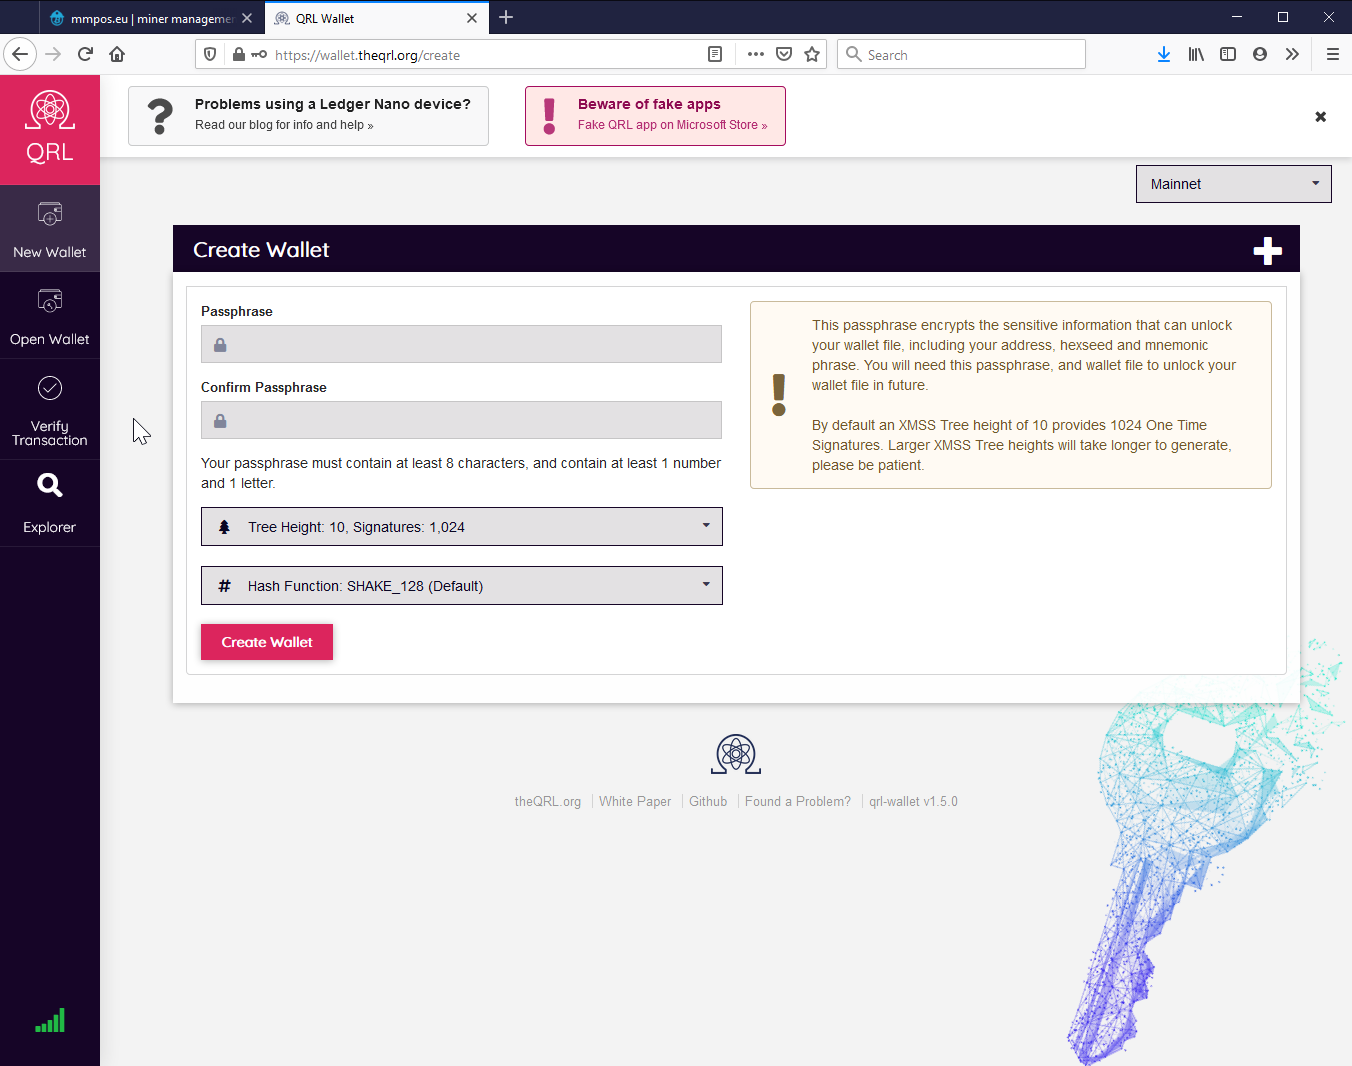
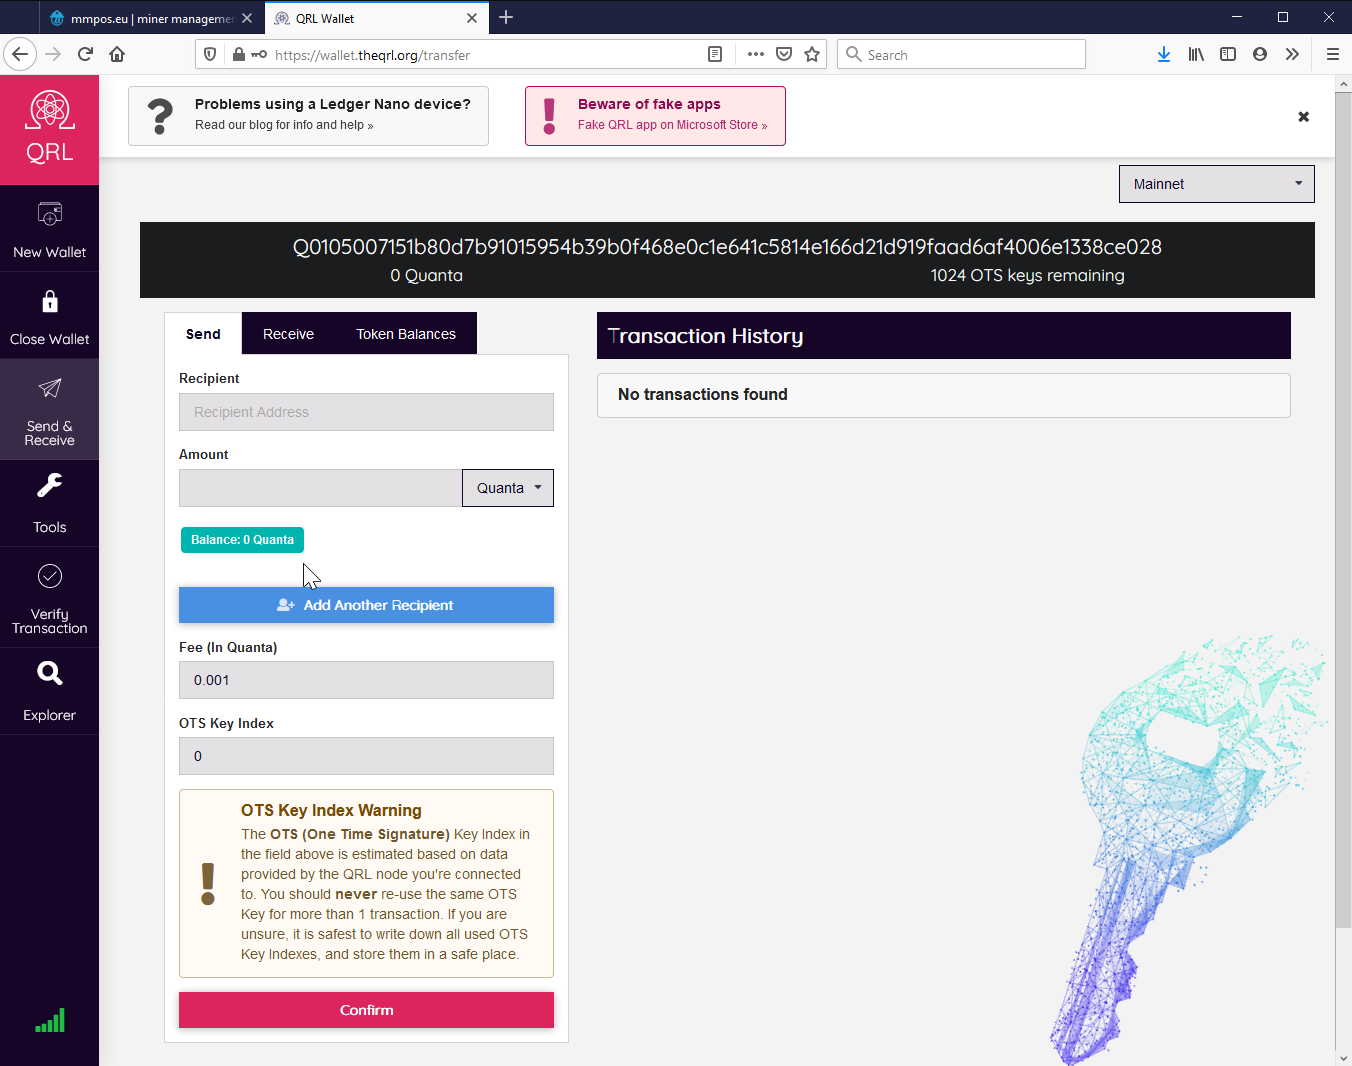
Step 3: Create a QRL Wallet and get its Address
You can follow our documentation guide, but it should be straightforward to go to https://wallet.theqrl.org and create a wallet there.
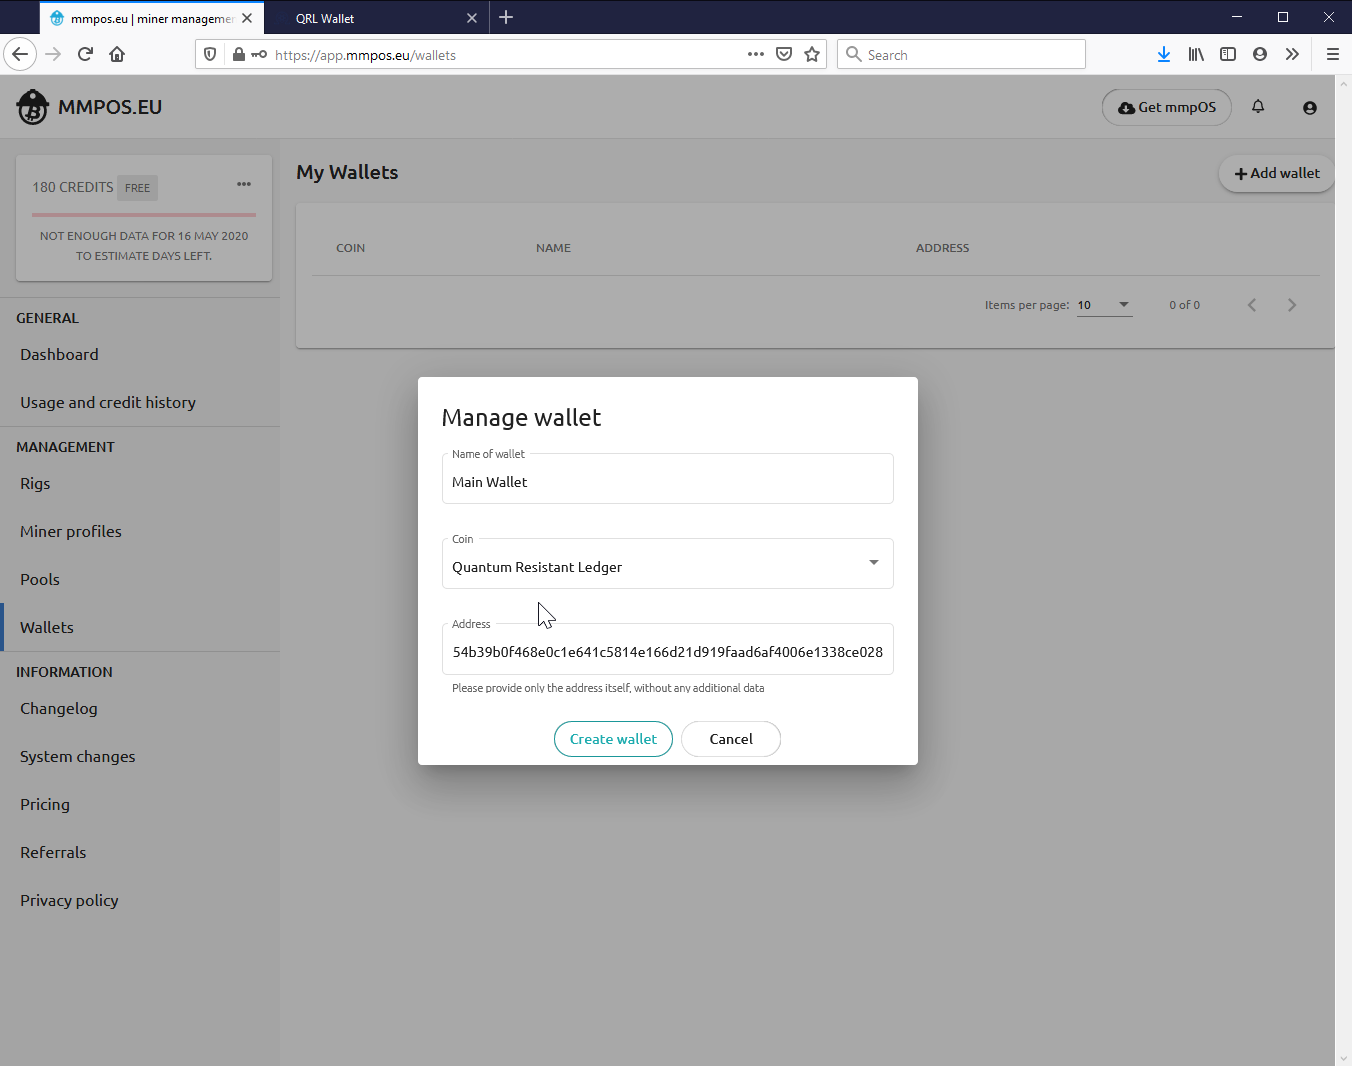
Step 4: Add wallet address to mmpOS
Click on wallets in the sidebar of the mmpOS web interface or go to https://app.mmpos.eu/wallets to add a wallet. Make sure you select “Quantum Resistant Ledger”
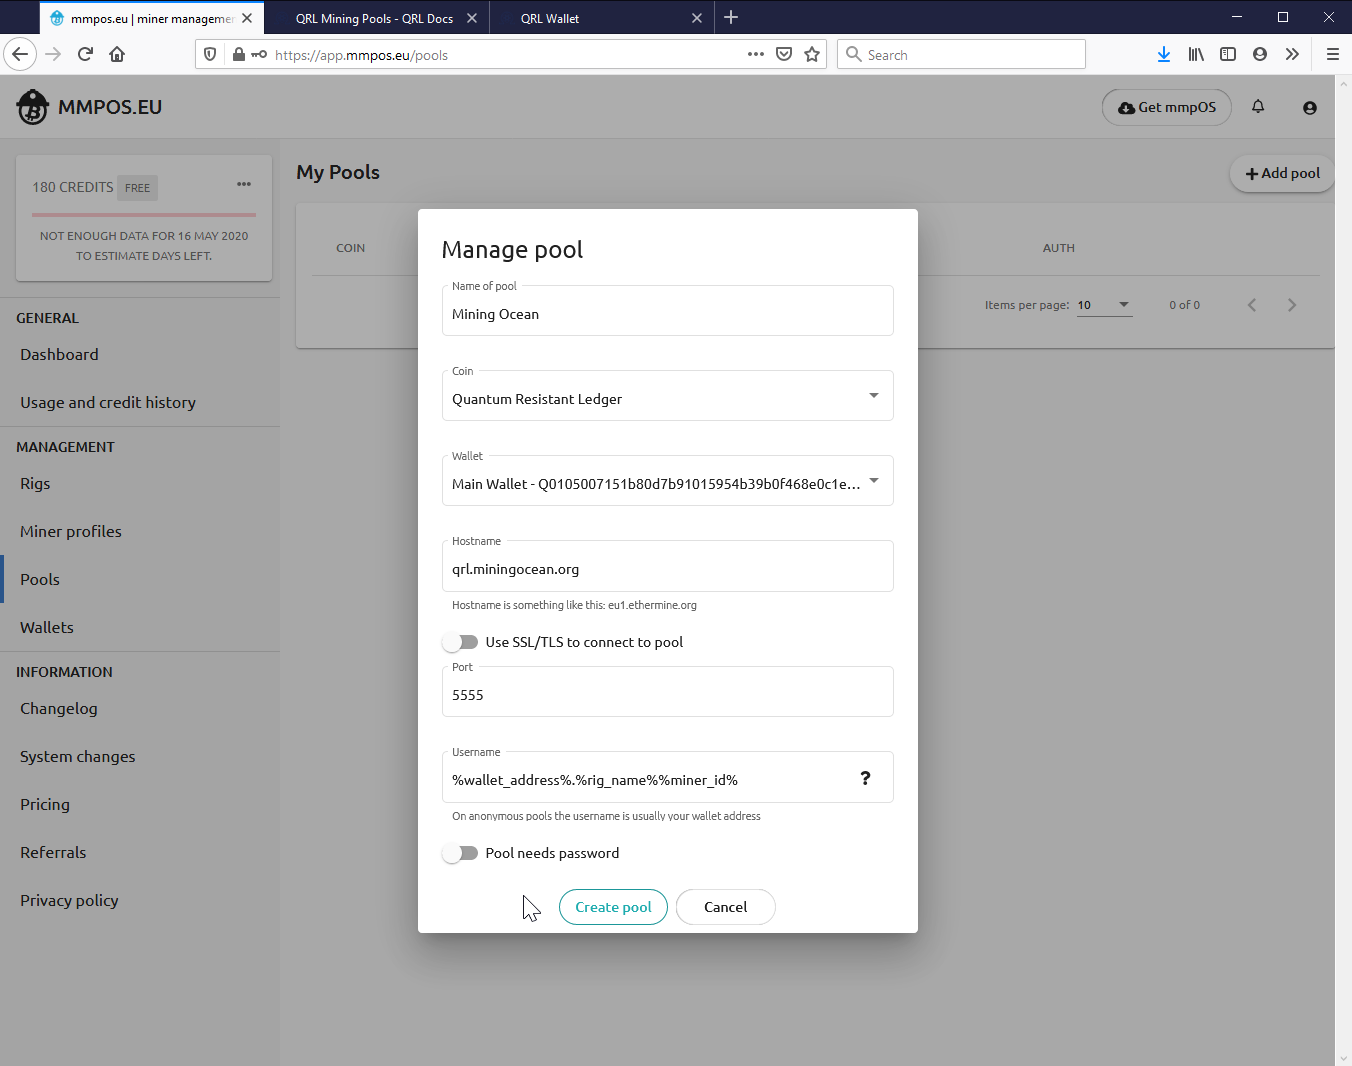
Step 5: Add a pool
Click on pools in the sidebar of the web mmpOS interface or go to https://app.mmpos.eu/pools/ to and click Add Pool in the top right hand corner.
You can find pool information in our documentation at https://docs.theqrl.org/mining/pools/.
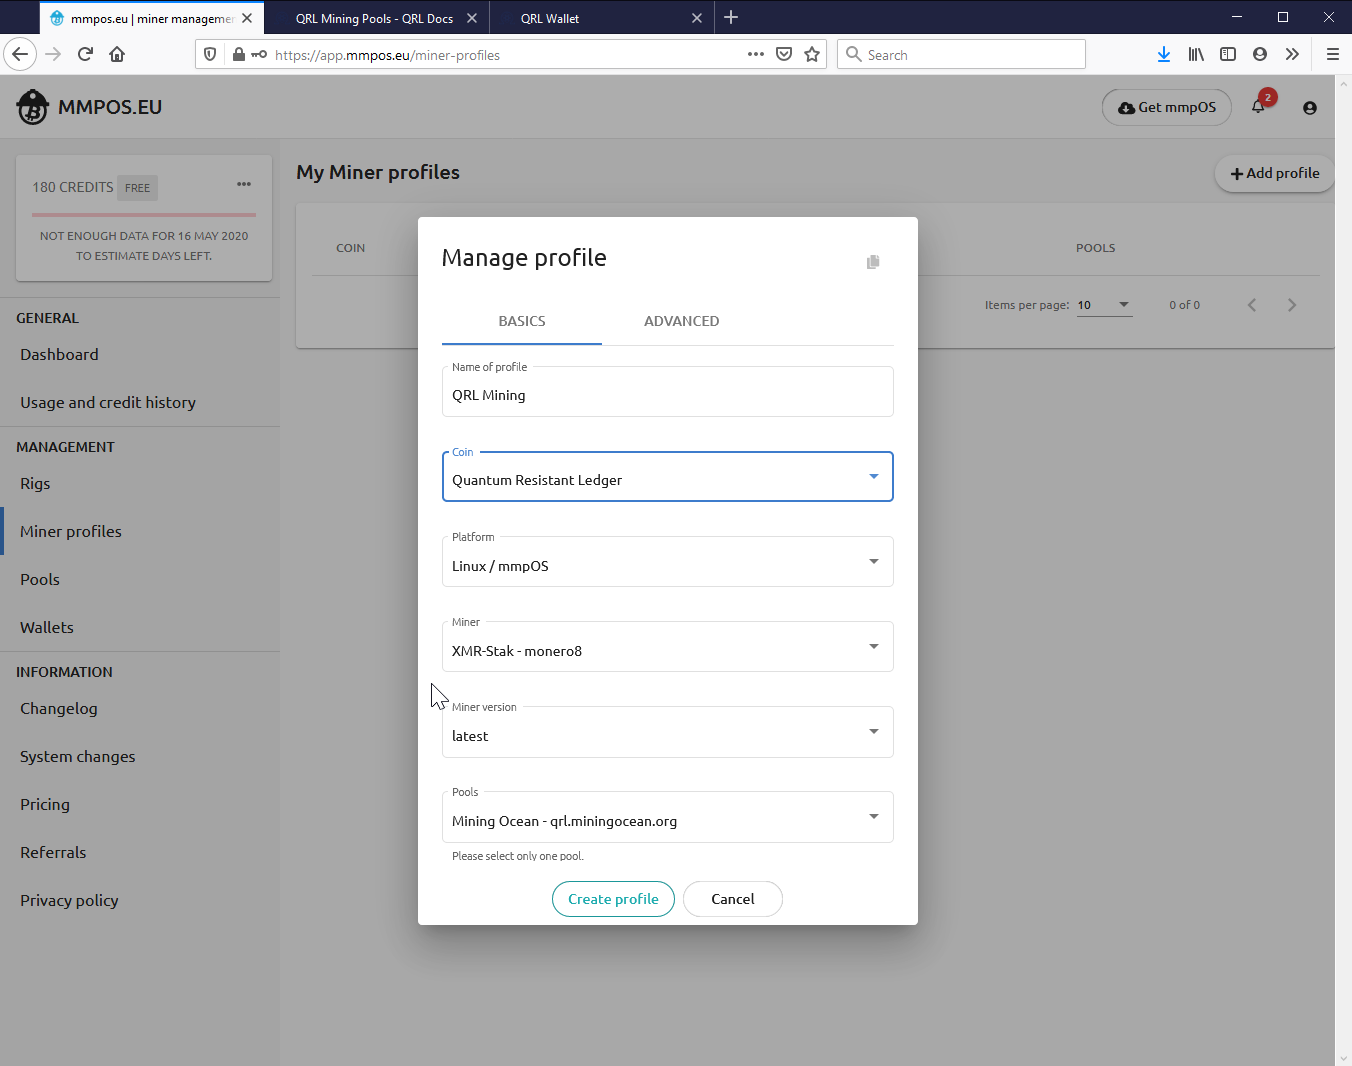
Step 6: Add a miner profile
A miner profile combines a miner with a pool selected. Because your miner is going to be on Windows and we’re mining with randomx, change the platform to *Windows *and Miner to xmrig randomx.
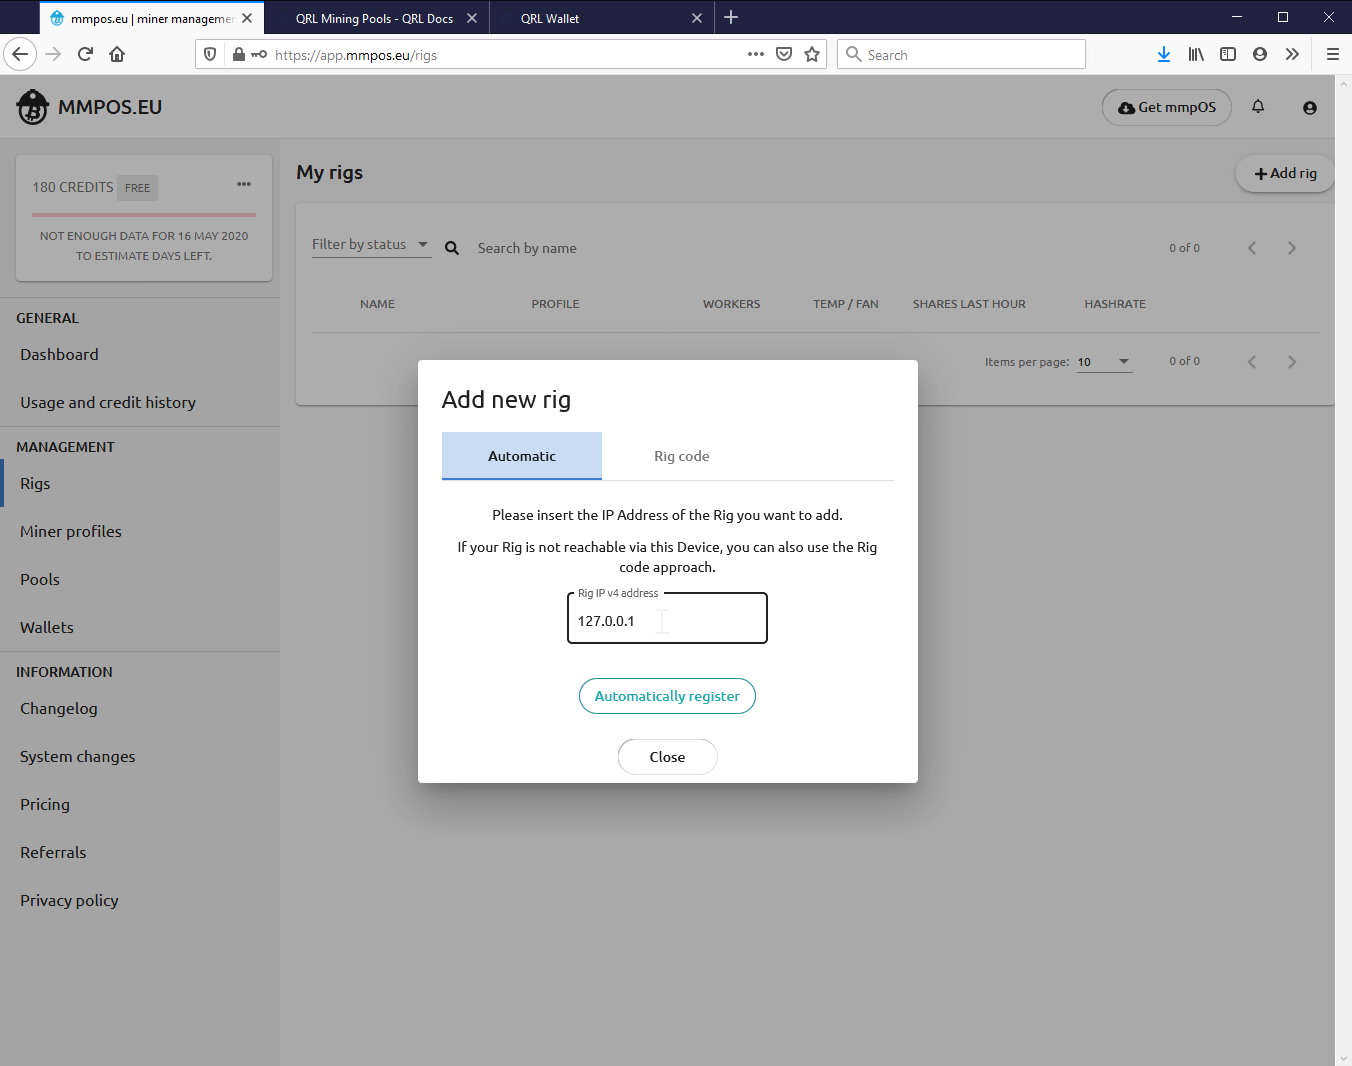
Step 7: Add a mining rig
If you haven’t already, launch the agent from the extracted folder in Step 2
Then go to rigs in the sidebar of the web mmpOS interface or visit https://app.mmpos.eu/rigs and click on Add rig.
Because the agent is on the same system, you should be able to automatically register it by clicking on “Automatically register”. When you do so, you should see activity in your agent console window.
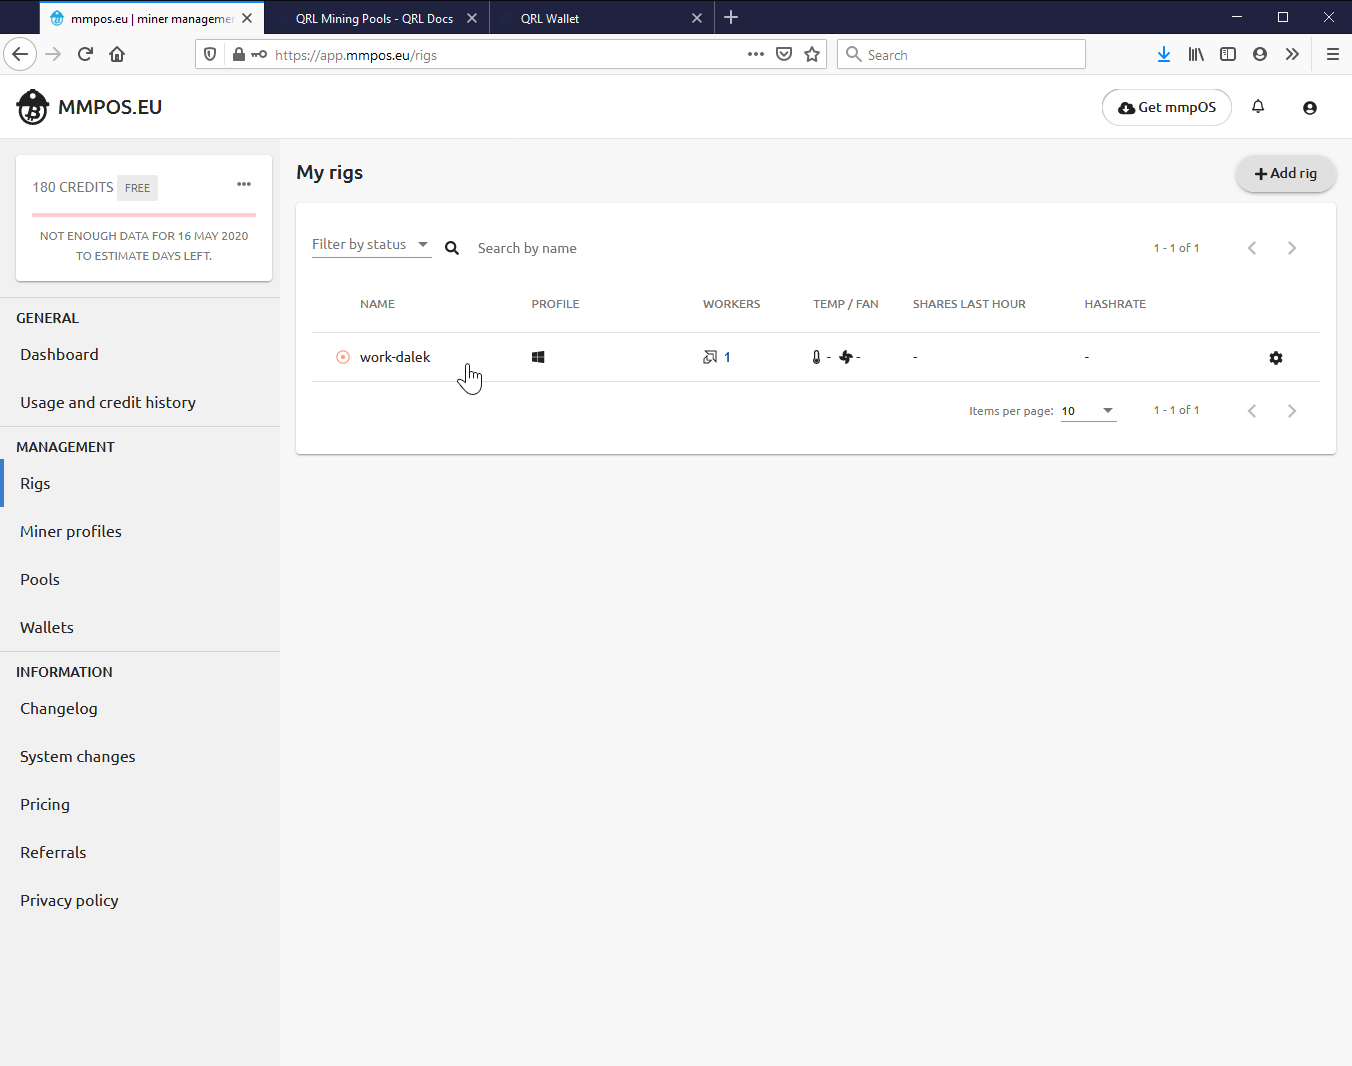
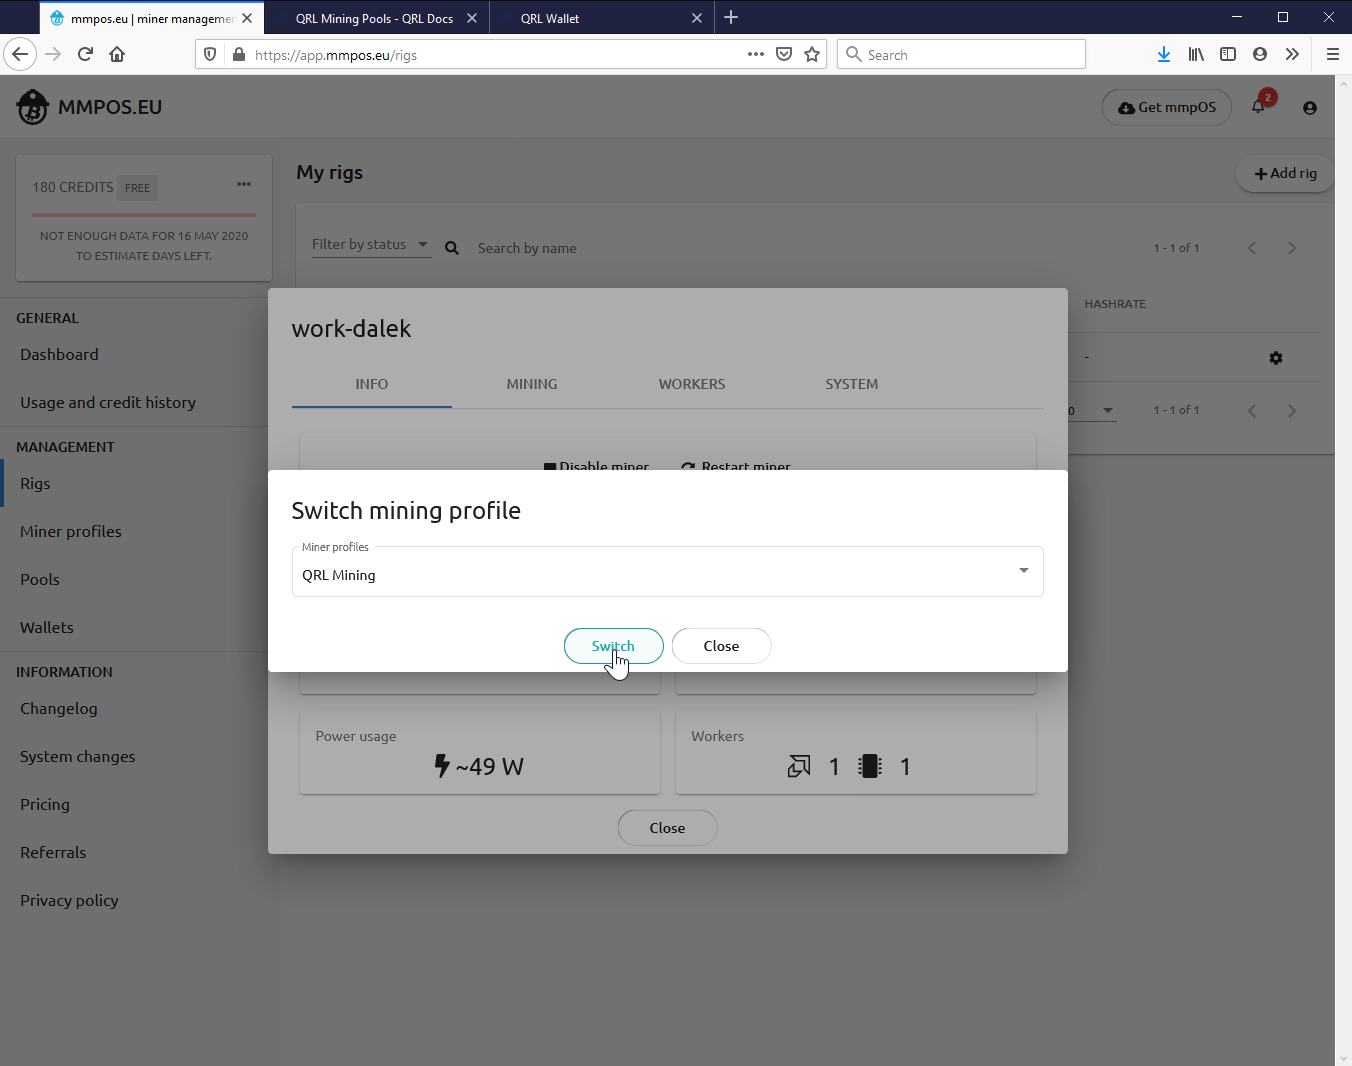
Step 8: Configure the miner rig
Click on your mining rig name and make sure everything is setup correctly. If no mining profile is selected, select the one you made earlier.
Step 9: That should be it!
The agent will download the selected miner and start mining. After a few minutes, you’ll start to see charts display.
Step 10: Stuck? Get help
mmpOS has a discord and telegram with people that are always willing to help.
15th May 2020